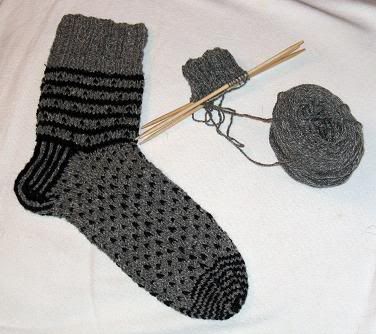
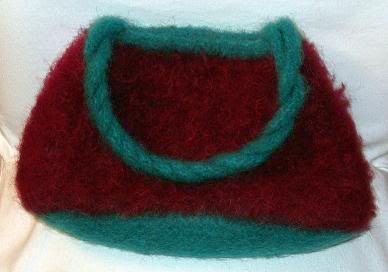
I have made good progress on my sock, and can't wait to get to the other one so I can wear them. I've also started a shawl, and am right now finishing a booga bag in Noro #95. How many of these are out there? Whenever I was trying to decide what to do, a google produced more than enough results. This must be one of the most popular patterns out there!
Here I was not blogging because I hadn't taken the time to get any pictures, but I see my pictures are not loading anyway. I'll get on that and get some pics up soon.
Thursday, April 28, 2005
Saturday, April 02, 2005
How I installed a zipper
Zipper installation can be very intimidating. I sweated over the basketweave sweater for weeks; the gradual arrival of warm weather doomed basketweave for the season and heightened my anxiety. Torn between finishing the sweater or giving it to Rob next Christmas, I finally just picked up a needle and started.
1. First, I basted the zipper in place. I used bright red embroidery thread and nice long stitches. I zipped the zipper, held the sweater right-side facing, and started at the top. I tried pinning it in place first but that made the fabric buckle. I did tear out my basting several times before it was perfect, but that's the beauty of basting. I basted along the first row of knit stiches, making sure the edge of the knitting was even all the way down and that the two sides of the knit garment nearly met. I didn't want them to be caught in the zipper but wanted them as close to each other as possible, when zipped together. I then basted the other side of the zipper.
2. I then unzipped the zipper and basted the outer edge of the zipper facing to the sweater. I was less meticulous here and did it more for security than anything else. When done, I zipped the zipper again and admired my work. Once the basting looks great, your sewing will look great too. Bad basting cannot be corrected by good sewing. Baste well, grasshopper.
3. I used invisible nylon thread to sew my zipper. I bought the good stuff at a nice sewing store and it was so insible I often had difficulty finiding it. I almost went blind sewing with it.
4. Starting at the top, on the right side, I used a straight stitch, with occasional backstitches for good measure, down the zipper right around where I basted. I pulled the thread until the knit stitch puckered a bit, then released it. I did not want the stitches to be too tight. If you go in between two stitches, there's a nice space there for the stitch to be pretty small. I also, when on the knit side, made my stitches short, even though the thread was invisible and wouldn't have shown anyway.
5. When I got to the bottom, I cut my thread and started again on the other side. My zipper was too long and needed to be trimmed, but I did not want to do that til it was fully installed. I do not trust my measuring skills, for good reason.
6. When both sides were installed, I removed my basting thread and gasped at the perfection. Do not skip the admiration steps, they are very motivational. When it's 2am and you are torn between sleep and finishing a project, it's the admiration that will keep you going.
7. I then unzipped the zipper and used an overcast stitch to tack down the outer edge of the zipper and then remove the basting. Now your zipper is secure and you can unzip and zip and giggle for several minutes, or longer. It really never gets old.
8. My zipper was about 6 inches too long, so now I trimmed it and wound some thread around the bottom a bunch of times so the zipper do-dad wouldn't fly off down Rob's shirt. This part was easy and made me regret all the time I spent at Joann's only looking at the right length zippers. The zipper world is your oyster.
Here's the finished result (I installed a knit facing to cover the interior zipper facing - another story):

That's it! I hope this helps someone gather the courage to install their own zipper.
1. First, I basted the zipper in place. I used bright red embroidery thread and nice long stitches. I zipped the zipper, held the sweater right-side facing, and started at the top. I tried pinning it in place first but that made the fabric buckle. I did tear out my basting several times before it was perfect, but that's the beauty of basting. I basted along the first row of knit stiches, making sure the edge of the knitting was even all the way down and that the two sides of the knit garment nearly met. I didn't want them to be caught in the zipper but wanted them as close to each other as possible, when zipped together. I then basted the other side of the zipper.
2. I then unzipped the zipper and basted the outer edge of the zipper facing to the sweater. I was less meticulous here and did it more for security than anything else. When done, I zipped the zipper again and admired my work. Once the basting looks great, your sewing will look great too. Bad basting cannot be corrected by good sewing. Baste well, grasshopper.
3. I used invisible nylon thread to sew my zipper. I bought the good stuff at a nice sewing store and it was so insible I often had difficulty finiding it. I almost went blind sewing with it.
4. Starting at the top, on the right side, I used a straight stitch, with occasional backstitches for good measure, down the zipper right around where I basted. I pulled the thread until the knit stitch puckered a bit, then released it. I did not want the stitches to be too tight. If you go in between two stitches, there's a nice space there for the stitch to be pretty small. I also, when on the knit side, made my stitches short, even though the thread was invisible and wouldn't have shown anyway.
5. When I got to the bottom, I cut my thread and started again on the other side. My zipper was too long and needed to be trimmed, but I did not want to do that til it was fully installed. I do not trust my measuring skills, for good reason.
6. When both sides were installed, I removed my basting thread and gasped at the perfection. Do not skip the admiration steps, they are very motivational. When it's 2am and you are torn between sleep and finishing a project, it's the admiration that will keep you going.
7. I then unzipped the zipper and used an overcast stitch to tack down the outer edge of the zipper and then remove the basting. Now your zipper is secure and you can unzip and zip and giggle for several minutes, or longer. It really never gets old.
8. My zipper was about 6 inches too long, so now I trimmed it and wound some thread around the bottom a bunch of times so the zipper do-dad wouldn't fly off down Rob's shirt. This part was easy and made me regret all the time I spent at Joann's only looking at the right length zippers. The zipper world is your oyster.
Here's the finished result (I installed a knit facing to cover the interior zipper facing - another story):
That's it! I hope this helps someone gather the courage to install their own zipper.
Subscribe to:
Posts (Atom)


