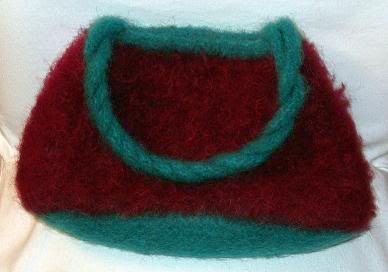
Felted Easter Egg Basket
Size 13 – 24” circular needles
Size 13 DPNs
2 skeins (100 yards each) worsted weight yarn for main color (or 1 skein bulky)
2 skeins (100 yards each) worsted weight yarn for contrasting color (optional) (or one skein bulky)
1 skein novelty yarn (optional)
I used a contrasting color for the basket bottom and brim. If using worsted weight yarn, two strands are held together throughout. Both Berocco Ultra Alpaca and Manos del Uruguay worked well for this project. Berocco’s Squiggle was a great novelty yarn with a grassy texture for the brim. A mohair blend also produced a nice fuzzy brim.
To form basket bottom:
Using contrasting color and circular needle, cast on 17 stitches. Knit every row for 32 rows, or until you have a square. Do not cast off.
To form basket sides:
Pick up stitches along the 3 sides of the square. You’ll pick up one stitch between each garter ridge – I was able to pick up 16 stitches on two sides and 17 on the cast-on side. Knit the 4th side and place marker. Change to main color and knit in the round until piece measures 6”.
To create brim:
Change to contrasting color and novelty yarn, if using. (If novelty yarn is bulky, use one strand of worsted and one strand of novelty.) Knit 6 stitches. Place 5 stitches onto holder. Cast on 5 stitches using the backward loop method. Knit the remaining 6 stitches on the basket side, then proceed to knit the next 16 or 17 stitches on the adjoining side. Repeat for the remaining two sides of the basket. Knit a 3” brim and cast off loosely. When cutting yarn, leave a good long tail; fold the brim and use the tail to slip stitch the brim in half. There will be a hole where the live stitches are on a holder. This will be filled in when you knit the handle. Simply cuff the rim as you pass those live stitches.
To knit handles:
Slip 5 stitches from holder onto DPN. Leaving a long tail, join yarn with contrasting color (or for a mottled look, use one strand of main color and one strand of contrasting color), and knit 3 rows st st. Begin I-cord for remainder of handle. When handle is 17”, knit 3 rows st st and perform 3-needle bind off to connect handle to remaining 5 stitches on opposite side of bag. Cut yarn, leaving a long tail. Before weaving these tails in, stitch the handle to the rim along the bottom and sides. This gives the handle extra support so it doesn’t flop over. Weave in ends and felt.
To felt:
Place in washer on hottest setting, smallest load. Add a tiny bit of detergent and agitate, without going through spin cycle, for 15-20 minutes. Check frequently, as different wools felt at different rates. When desired felting level is reached, remove from washer and remove excess water (I squeeze mine out, then wrap it in a towel and step on it). Shape and allow to dry.