Still no pictures, but lots of knitting is going on!
I have finished two sweet baby sweaters for two sweet babies. One was finished just before delivering (the sweater, not the baby), for a neighbor, so I didn't have time to get a picture. That is, I didn't find the camera in time to take the picture. Later, I caught Rob using his own camera (the nerve!), so I know it isn't lost. I'm also making good progress on my own sweater (the nerve!) and can't wait to share pics of that.
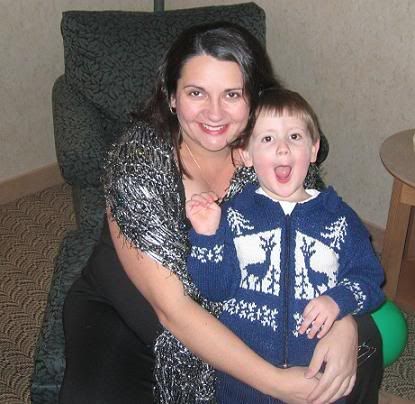
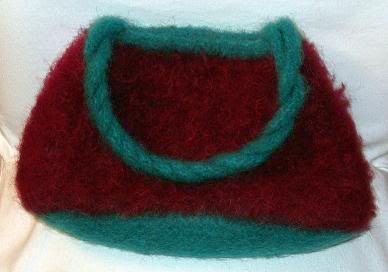
In other news, I met the Yarn Harlot and am still utterly in love. And, I am famous (in blogland)! Here's a picture of me at the book signing (with my booga bag, the only thing I've knit for myself, how sad is that?): Snooze's blog
You have to scroll all the way down almost to the bottom, but I am in there in the May 7th post.
Thursday, May 19, 2005


Thursday, April 28, 2005
Yet another Booga Bag enters the Internet
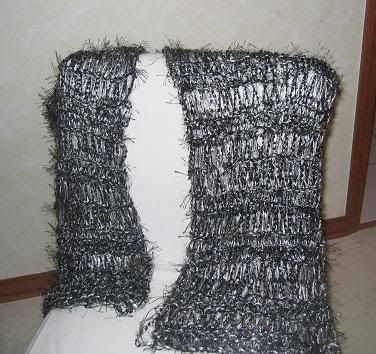
I have made good progress on my sock, and can't wait to get to the other one so I can wear them. I've also started a shawl, and am right now finishing a booga bag in Noro #95. How many of these are out there? Whenever I was trying to decide what to do, a google produced more than enough results. This must be one of the most popular patterns out there!
Here I was not blogging because I hadn't taken the time to get any pictures, but I see my pictures are not loading anyway. I'll get on that and get some pics up soon.
Here I was not blogging because I hadn't taken the time to get any pictures, but I see my pictures are not loading anyway. I'll get on that and get some pics up soon.
Saturday, April 02, 2005
How I installed a zipper
Zipper installation can be very intimidating. I sweated over the basketweave sweater for weeks; the gradual arrival of warm weather doomed basketweave for the season and heightened my anxiety. Torn between finishing the sweater or giving it to Rob next Christmas, I finally just picked up a needle and started.
1. First, I basted the zipper in place. I used bright red embroidery thread and nice long stitches. I zipped the zipper, held the sweater right-side facing, and started at the top. I tried pinning it in place first but that made the fabric buckle. I did tear out my basting several times before it was perfect, but that's the beauty of basting. I basted along the first row of knit stiches, making sure the edge of the knitting was even all the way down and that the two sides of the knit garment nearly met. I didn't want them to be caught in the zipper but wanted them as close to each other as possible, when zipped together. I then basted the other side of the zipper.
2. I then unzipped the zipper and basted the outer edge of the zipper facing to the sweater. I was less meticulous here and did it more for security than anything else. When done, I zipped the zipper again and admired my work. Once the basting looks great, your sewing will look great too. Bad basting cannot be corrected by good sewing. Baste well, grasshopper.
3. I used invisible nylon thread to sew my zipper. I bought the good stuff at a nice sewing store and it was so insible I often had difficulty finiding it. I almost went blind sewing with it.
4. Starting at the top, on the right side, I used a straight stitch, with occasional backstitches for good measure, down the zipper right around where I basted. I pulled the thread until the knit stitch puckered a bit, then released it. I did not want the stitches to be too tight. If you go in between two stitches, there's a nice space there for the stitch to be pretty small. I also, when on the knit side, made my stitches short, even though the thread was invisible and wouldn't have shown anyway.
5. When I got to the bottom, I cut my thread and started again on the other side. My zipper was too long and needed to be trimmed, but I did not want to do that til it was fully installed. I do not trust my measuring skills, for good reason.
6. When both sides were installed, I removed my basting thread and gasped at the perfection. Do not skip the admiration steps, they are very motivational. When it's 2am and you are torn between sleep and finishing a project, it's the admiration that will keep you going.
7. I then unzipped the zipper and used an overcast stitch to tack down the outer edge of the zipper and then remove the basting. Now your zipper is secure and you can unzip and zip and giggle for several minutes, or longer. It really never gets old.
8. My zipper was about 6 inches too long, so now I trimmed it and wound some thread around the bottom a bunch of times so the zipper do-dad wouldn't fly off down Rob's shirt. This part was easy and made me regret all the time I spent at Joann's only looking at the right length zippers. The zipper world is your oyster.
Here's the finished result (I installed a knit facing to cover the interior zipper facing - another story):

That's it! I hope this helps someone gather the courage to install their own zipper.
1. First, I basted the zipper in place. I used bright red embroidery thread and nice long stitches. I zipped the zipper, held the sweater right-side facing, and started at the top. I tried pinning it in place first but that made the fabric buckle. I did tear out my basting several times before it was perfect, but that's the beauty of basting. I basted along the first row of knit stiches, making sure the edge of the knitting was even all the way down and that the two sides of the knit garment nearly met. I didn't want them to be caught in the zipper but wanted them as close to each other as possible, when zipped together. I then basted the other side of the zipper.
2. I then unzipped the zipper and basted the outer edge of the zipper facing to the sweater. I was less meticulous here and did it more for security than anything else. When done, I zipped the zipper again and admired my work. Once the basting looks great, your sewing will look great too. Bad basting cannot be corrected by good sewing. Baste well, grasshopper.
3. I used invisible nylon thread to sew my zipper. I bought the good stuff at a nice sewing store and it was so insible I often had difficulty finiding it. I almost went blind sewing with it.
4. Starting at the top, on the right side, I used a straight stitch, with occasional backstitches for good measure, down the zipper right around where I basted. I pulled the thread until the knit stitch puckered a bit, then released it. I did not want the stitches to be too tight. If you go in between two stitches, there's a nice space there for the stitch to be pretty small. I also, when on the knit side, made my stitches short, even though the thread was invisible and wouldn't have shown anyway.
5. When I got to the bottom, I cut my thread and started again on the other side. My zipper was too long and needed to be trimmed, but I did not want to do that til it was fully installed. I do not trust my measuring skills, for good reason.
6. When both sides were installed, I removed my basting thread and gasped at the perfection. Do not skip the admiration steps, they are very motivational. When it's 2am and you are torn between sleep and finishing a project, it's the admiration that will keep you going.
7. I then unzipped the zipper and used an overcast stitch to tack down the outer edge of the zipper and then remove the basting. Now your zipper is secure and you can unzip and zip and giggle for several minutes, or longer. It really never gets old.
8. My zipper was about 6 inches too long, so now I trimmed it and wound some thread around the bottom a bunch of times so the zipper do-dad wouldn't fly off down Rob's shirt. This part was easy and made me regret all the time I spent at Joann's only looking at the right length zippers. The zipper world is your oyster.
Here's the finished result (I installed a knit facing to cover the interior zipper facing - another story):
That's it! I hope this helps someone gather the courage to install their own zipper.
Thursday, March 31, 2005
Basketweave Celebration Dance
Basketweave is done. DONE!!! It is such a great feeling to have this monumental project completed. I am so happy with the way it all turned out. The zipper installation freaked me out but looks perfect. Charlene at my LYS suggested using invisible thread, and that made a huge difference. I was able to concentrate on getting it straight without worrying where the stitches were going. I am a terrible hand sewer but it didn't matter since my crooked stitches were invisible!
In the end, I knitted a facing to line the interior of the zipper. I wasn't happy with the contrast between the sweater color and zipper fabric color, and since Rob will not likely zip this thing all the way (althought he can! the zipper works! it's not just for looks!), that interior zipper will always be showing. So here's a shot of that (click for a larger view):

And here's a shot of Rob heading off to work in his new sweater (I stayed up til 2AM to finish it so he could wear it for casual day):

I felt such a thrill to see him wearing this sweater. He looks so fantastic in it! He is so impressed with my work and loves it. He told me he felt very loved when he wore it, which is exactly how I wanted him to feel. Merry Christmas, Rob!
In the end, I knitted a facing to line the interior of the zipper. I wasn't happy with the contrast between the sweater color and zipper fabric color, and since Rob will not likely zip this thing all the way (althought he can! the zipper works! it's not just for looks!), that interior zipper will always be showing. So here's a shot of that (click for a larger view):

And here's a shot of Rob heading off to work in his new sweater (I stayed up til 2AM to finish it so he could wear it for casual day):

I felt such a thrill to see him wearing this sweater. He looks so fantastic in it! He is so impressed with my work and loves it. He told me he felt very loved when he wore it, which is exactly how I wanted him to feel. Merry Christmas, Rob!
Sunday, March 27, 2005
Another FO
Long after the funeral, for which this sweater was intended to be worn, I've attached the buttons. My own design, I think it turned out pretty well. I would make it again for a girl, as the collar is a bit wide and seems a bit feminine to me, even in these boyish colors. Someday I will write up the pattern! It took only a few days (of frantic car-knitting) to knit because I used two strands of yarn held together. Here's the back (click any photo for a larger one):

Side:

And front:

The sweater is knit from Lana Gatto Labrador, and if anyone remembers, that's the yarn I got at the Super Bowl sale and planned to use for myself. Like most things around here, it went to Marty. Cute though, eh?

Side:

And front:

The sweater is knit from Lana Gatto Labrador, and if anyone remembers, that's the yarn I got at the Super Bowl sale and planned to use for myself. Like most things around here, it went to Marty. Cute though, eh?
Monday, March 21, 2005
Cute for a Granny
I was so excited to make these littles cuties, after seeing them discussed in a knitting forum, that I ran to Joann's to buy some yarn:

They are egg covers for plastic or Cadbury eggs. I used Paton's Divine to make the bunny soft and fluffy, but used something much less expensive for the chick - not sure what it was, but I'm sure it's acrylic. The eyes, pompoms, and pipe cleaners were super cheap. I was planning to make a whole family of them, but lost heart a bit when my mom saw them and remarked that they were a bit old-ladyish. Are they? I still think they are cute, but don't giggle quite as much every time I pass by them.
Instead of making more egg covers or finishing one of my pairs of something (did I mention I also have one slipper that I made about 5 months ago?), I cast on the Dale cardigan. I loved doing the colorwork chart from the Norwegian mitten workshop, and felt much less intimidated by this cardigan. I'm a bit concerned that it is puckering too muhc, but I'm keeping my fingers crossed that I can pull the stitches into place and that blocking will solve all. I've gotten through all the grey and a bit of the khaki - about 6 inches so far:

They are egg covers for plastic or Cadbury eggs. I used Paton's Divine to make the bunny soft and fluffy, but used something much less expensive for the chick - not sure what it was, but I'm sure it's acrylic. The eyes, pompoms, and pipe cleaners were super cheap. I was planning to make a whole family of them, but lost heart a bit when my mom saw them and remarked that they were a bit old-ladyish. Are they? I still think they are cute, but don't giggle quite as much every time I pass by them.
Instead of making more egg covers or finishing one of my pairs of something (did I mention I also have one slipper that I made about 5 months ago?), I cast on the Dale cardigan. I loved doing the colorwork chart from the Norwegian mitten workshop, and felt much less intimidated by this cardigan. I'm a bit concerned that it is puckering too muhc, but I'm keeping my fingers crossed that I can pull the stitches into place and that blocking will solve all. I've gotten through all the grey and a bit of the khaki - about 6 inches so far:
Monday, March 14, 2005
SES - Second Everything Syndrome
Here are my most recent cast-offs:
One clog, not yet felted:

One mitten:

I learned how to make this Norwegian mitten at an all-day knitting workshop, led by Beth Brown-Reinsel (author of Knitting Ganseys). It was a wonderful workshop and I learned a ton. It was also the first time I had been gone from Marty all day - from before he woke up in the morning until 4:30 in the afternoon. Rob took great care of him, even if he did give him cinnamon toast. He even got him down for a nap!
Back to the mitten: look at the palm!

The thumb shaping is a bit off, so I will be re-working it. And here's a shot of the back of the thumb, which I love:

Now with one clog and one mitten, you'd think I'd be working on the second of one of those pairs, right? Not me! I cast on a ribbed sock with my lovely Koigu, and couldn't be happier! I'm using my new 5" DPNs from doublepointed.com and am thrilled with the way the shorter needles stay out of my way. I'm also thrilled with the color selection of this Koigu:

So here I am with one of everything, and nothing to wear!
One clog, not yet felted:
One mitten:
I learned how to make this Norwegian mitten at an all-day knitting workshop, led by Beth Brown-Reinsel (author of Knitting Ganseys). It was a wonderful workshop and I learned a ton. It was also the first time I had been gone from Marty all day - from before he woke up in the morning until 4:30 in the afternoon. Rob took great care of him, even if he did give him cinnamon toast. He even got him down for a nap!
Back to the mitten: look at the palm!
The thumb shaping is a bit off, so I will be re-working it. And here's a shot of the back of the thumb, which I love:
Now with one clog and one mitten, you'd think I'd be working on the second of one of those pairs, right? Not me! I cast on a ribbed sock with my lovely Koigu, and couldn't be happier! I'm using my new 5" DPNs from doublepointed.com and am thrilled with the way the shorter needles stay out of my way. I'm also thrilled with the color selection of this Koigu:
So here I am with one of everything, and nothing to wear!
Subscribe to:
Posts (Atom)